Abstract Watercolor Painting Tutorial
These easy abstract watercolor painting instructions will have you painting your own abstract art in no time! All you need are a pencil, watercolor paints, a piece of watercolor paper, a paint brush, and an hour or so of your time, and you'll be on the road to making your own colorful abstract art!
These abstract painting instructions will demonstrate how to make a watercolor painting like this:

Many budding artists, art students, and even seasoned realist painters are not sure where to begin when painting abstract art. A common problem faced by people learning how to paint abstract art for the first time is that they think "abstract" means that "anything goes". While it is true that in today's art world, anything does go, it is useful to learn the method behind the madness (so to speak) when it comes to abstract art.
p.s.... If you are a total neophyte to abstract art, meaning you look at an abstract painting and think "My 5 year old could have done that", please check out my two informative pages about understanding abstract art. These two pages will enlighten you on what abstract art is and what it isn't. If you like what you read, come back and make some abstract art of your own!
If you've read my intro to abstract art, then you'll know that the formal (visual) elements of abstract art can include any one or more of the following: line, color, form, shape, pattern or texture.
In these abstract watercolor painting instructions, we'll focus mainly on color and shape, with a little bit of pattern thrown in towards the end of the watercolor painting lesson.
In addition to demonstrating how to use these formal elements to create abstract art, these abstract watercolor painting instructions will also show you how to mix watercolors to create analogous colors. Cool, huh?!
Since these abstract watercolor painting instructions show you the basic steps to creating your own abstract watercolor paintings, you can adapt these instructions in a number of ways, lifting your wings to create abstract watercolor paintings in any variety of colors, using any number of shapes in all types of sizes. Use these abstract watercolor paintings as a starting point for freeing your creativity - as a springboard for getting you to think and learn about how to make your own abstract art.
For instance, these basic instructions were also used to the create the abstract watercolor painting below:

Sound cool? Let's try it out!
The supplies for this easy-to-follow watercolor lesson are minimal and inexpensive. These means you can try your hand at painting abstract art without breaking the bank!
Although this lesson is done using watercolors, you could take the basic instructions and use them with colored pencils, acrylics, markers, etc to create your own abstract art.
Abstract Watercolor Painting Supplies List:
I've provided links below to the relevant products so that you can easily find them on Blick Art Materials, my favorite online art supplier. I'm a member of Blick's affiliate program, which means if you make a purchase after clicking on one of these links, I'll receive a small commission (at no extra cost to you). Your purchase helps support this site and keeps it free of ads. Click here for more info.
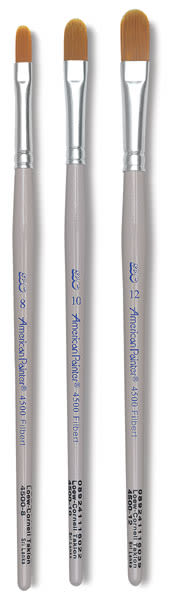
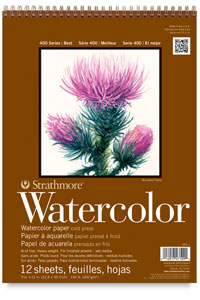
All you need is a pencil, watercolor paper, watercolor paints (pan or tubes), and a small paintbrush (size 0 or 1).
Ready to make your own abstract watercolor paintings?
Here we go!
On your watercolor paper, use your pencil to draw a few simple shapes all over your paper. You can see what I've drawn below. I chose to draw things like circles, triangles, trapezoids, rectangles, tear drops and squigglies.
You don't have to draw the same shapes - you can use your imagination and draw whatever shapes you want!

Next, add more simple pencil shapes to the ones you've just drawn. I tried to "connect" the new shapes to the ones already on the paper.
If this sounds confusing at all, scroll to the next picture for a visual explanation.

In the image below, I've outlined the new shapes in red. These new shapes are the ones that I added to the first array of shapes.


Now that you've drawn some simple basic shapes and then added some more basic shapes, it's time to get out the watercolors!
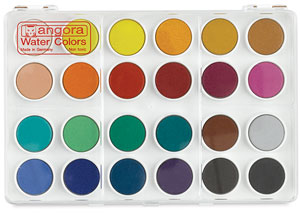
You can use watercolors from tubes or watercolors in a pan. As you can see, I used watercolors in a pan. These were a fairly inexpensive set that I purchased for under $20.
The clear lid of the watercolor case lifts up to become a watercolor palette. This is where you can mix colors. Since the palette is clear, I placed a piece of plain white paper behind it, to make it easier to see the colors I'm mixing.
When you are done with your painting, you can either wait for the leftover paint to dry on the palette and then close it (if you plan to re-use the mixed colors later), or you can simply wash the palette clean using plain water, patting it dry with paper towels or a rag.
So, using a small brush (I used a Size 0), choose a color. As you can see, I chose red.
Choose a few of the shapes on your paper and fill them in with your choice of paint.

After you've filled in a few shapes, choose another color. I chose yellow, because red and yellow are both primary colors that can be used to make orange. I placed the yellow paint next to the red painting on the palette and then I mixed the two together with my brush to make a nice orange color.

I filled in a few of the shapes using the mixed orange:

Next I decided to lighten the color by adding some white.

Here is how it looked after I mixed it (see image below).
Note that I didn't mix all the paint together - I left some orange and some red in case I want to go back and use those colors again (which I will later).

I used my new pale ochre color to fill in a few more shapes.

Now that I've gone from red to orange to ochre, I decided to go a bit darker. I added brown to the red and mixed them together on the palette.

Using the brown paint, I finished painting in the rest of the shapes.
Using your choice of colors, follow these steps of mixing colors on your palette and filling in shapes until they are all painted.

Depending on how detailed your want your abstract watercolor painting to be, you can actually choose to stop now if you like the way it looks - or you can forge ahead if you are a detail-addict like me.
At this point I decided to jazz it up a bit by adding some repetitive designs - otherwise known as patterns. A pattern can be as simple as a row of circles - which is exactly what I've done! I added lines of orange circles around various shapes. It's a good thing I had some leftover orange!
(Although if I needed to, I could have always mixed some new orange. One thing to keep in mind when mixing colors though is that sometimes it can be difficult to mix the *exact* same color. For that reason, if you think you'll be using a lot of a certain mixed color, always mix more than you think you'll need.)

Next I added rows of yellow dots and brown dots around the other shapes.

Now, I really could have stopped here if I wanted to. Plenty of people would have considered this composition "done", finito, finished. But not me! If you've seen my abstract art, then you know how much I love DETAIL!
So to satiate my need for lotsa detail, I added some brown circles (as opposed to dots) around various parts of the paper. To further balance the composition and make it interesting, I also added some cute red triangles.
Now I think the abstract watercolor painting is finished!
Check it out!

One of the cool things about abstract art is that you can usually display it with any side facing up. You can turn it over and over, testing all four sides before deciding which way it looks best. There's a good chance that you like the way it looks with a different orientation than the one you were working on.
For instance, I think this painting looks pretty cool when displayed in this direction:

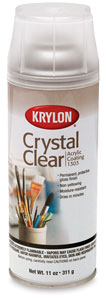
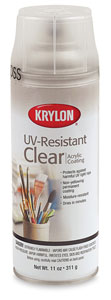
When you are done with your watercolor painting, it is a good idea to spray your finished masterpiece with a permanent fixative like Krylon Crystal Clear. This will make the painting waterproof and protect it from accidental and environmental damage.
Purchases from Blick Art Materials help support this site and keep it FREE! Thanks!

Remember how I said earlier that you can use these abstract watercolor painting instructions as a starting point to inspire you to create all kinds of abstract art? You can create many different variations of the painting I've demonstrated here.
For instance, check out the painting below. By following the abstract watercolor painting instructions I outlined above, I made this abstract watercolor painting below in less than an hour.
I used a different set of shapes, a different composition, and different colors. I also used a repetitive array of dots (yes! a dot pattern!) to visually "link" the whole painting together.

That should give you an idea of all the cool things you can do to create your own abstract watercolor paintings.
Have fun painting!

Click to return to the Abstract Art Table of Contents, where you can...