Acrylic Glazes
how to paint glazes in acrylics
This is Page 13 of a 15-page guide explaining how to paint photorealistically.
Acrylic glazes are the secret ingredient that bring photorealist paintings to life. A glaze is basically a thin layer of paint that is very translucent, allowing some of the color underneath to show through. The glaze subtly transforms the color of what is beneath. When many glazes are applied, the painted image begins to develop a sense of solidity and form, thanks to all the subtle layers of glazed paint.
So, how to paint acrylic glazes?
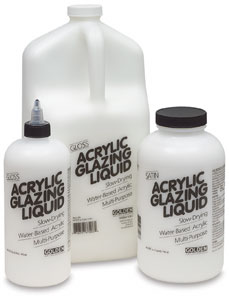
First, get your Acrylic Glazing Liquid or Acrylic Retarder. These will be your magic tools for creating acrylic glazes!
I've provided links below to the relevant products so that you can easily find them on Amazon. If you make a purchase, I receive a small commission (at no extra cost to you), which helps support this site.
Glazing Liquid and Retarder are both acrylic mediums that extend the drying time and workability of acrylic paintings, allowing them to stay wet for longer periods of time. You can read more about the qualities of glazing liquid and retarder here.


steps to painting with acrylic glazes
Squeeze out a tiny amount of glazing liquid or retarder. You only need to squeeze out the size of a US dime (17.91mm). You can add more as (and if) you run out.
Select your main color, dab some on your brush and swirl it on your palette, loosening up the paint. Add a quick dab of water and/or glazing liquid to increase the fluidity of the paint. In general, you want the paint to be thin, not thick, in order for it to be a glaze.
Next, select the other colors you're interested in, and mix them into your main color. Add more water and/or glazing liquid as you see fit. If the paint seems too thick, keeping adding more glazing liquid until your paint is nice and watery.
To see what I mean, look at the photo of my palette below. You can see that I only use a small amount of paint, but when making glazes, it goes a long way. The paint is so thin that you can see through the paint to the palette below. This is the level of consistency that you are aiming for.
When creating a glaze, what you're looking for is a mixture that is very fluid and thin. Not thick. So thin it almost looks inconsequential - it makes you think, "How can this tiny amount of paint have any effect on the canvas?" But you'd be surprised - when creating acrylic glazes for photorealist painting, a little amount has a great effect!

Sometimes the acrylic glazes are very watery, as this creates a very subtle transition. When my acrylic glazes get really watery, I lay the painting flat on a table and work on other things until the glaze is completely dry. This is important, because if the painting was upright on an easel, the glaze would either flow down (if it's too runny) or just a part of it will flow down, creating a little pool of intense pigment at the bottom of the area just painted. This isn't desirable, so it's best to lay the painting flat. Also, make sure that the glaze is totally dry before you work on it again. If you work on them too soon, you can ruin the glaze and will need to repaint that area.
If you're familiar with the properties of watercolors, then you'll notice that acrylic glazes almost feel like working in watercolor, in terms of the thin quality of the acrylic paint. So if you can get your glazes to resemble the transparent fluidity of watercolors, you're on the right track!
Of course, not everything you paint will need to be thin and watery. Sometimes you will need strong, bold, thick colors. Rather than load up the brush with lots of paint, I normally paint those areas that require solid, strong colors by building up to it. For example, instead of piling on the black to create a sharp shadow, I add a bit of black, let that dry, then add another bit of black, etc. until it looks finished. Although acrylic paints are very forgiving, it's still easier to add paint than it is to "subtract" paint - that is, to paint over a mistake you've just made.
But if you do make a mistake, don't worry. You can just paint over the problem area. This is the beauty of acrylics! Sometimes a mistake might be so whopping that it's distracting and you can't get your bearings in the painting. If this happens, just paint over the problem are with titanium white or titanium buff and start that area again.
So, to recap: after you paint your underpainting, in which you mapped out all the important areas of color, begin working on your glazes. Continue building up these thin, watery acrylic glazes until the image takes form and comes to life!
Next, read a review of everything we've covered thus far, and see the stages of a photorealist painting as it reaches completion. Also in the next lesson, I'll discuss the final varnish and various things to keep in mind when varnishing.


