Watercolor Pencil Art Lesson
This fun watercolor pencil art lesson shows you how to create colorful abstract art using watercolor pencils, watercolors and watercolor masking fluid!
In this detailed step-by-step art lesson, you'll be both drawing and painting - but don't worry, it's not hard at all! Because you'll be creating an abstract, anything goes in terms of color choices, shapes and designs, and the placement of those designs (in art terms, this is referred to as "composition").
Even if you've never used watercolor pencils before, you'll find that the techniques described here are easy to follow, providing you with a basis for further exploration and experimentation. Consider this a primer in how to use watercolor pencils!
You'll also learn how to use watercolor masking fluid. If you've never used masking fluid before, you'll discover what a wonderful tool it can be to create special effects in your watercolor art.
I've provided links below to the relevant products so that you can easily find them on Blick Art Materials, my favorite online art supplier. I'm a member of Blick's affiliate program, which means if you make a purchase after clicking on one of these links, I'll receive a small commission (at no extra cost to you). Your purchase helps support this site and keeps it free of ads. Click here for more info.
Materials Needed:
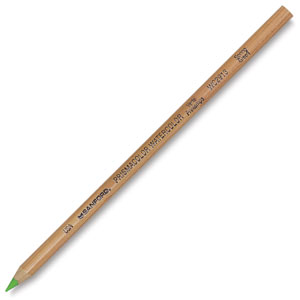
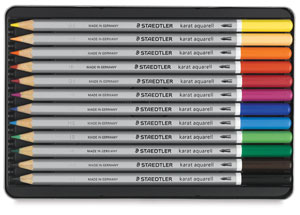
- Watercolor pencils - A set of 12 should be enough to get you going in this lesson. I have 2 sets of watercolor pencils - a set of 24 Prismacolor Watercolor Pencils and a set of 24 Staedtler Karat Watercolor Pencils, so I used colors from both sets in this tutorial.
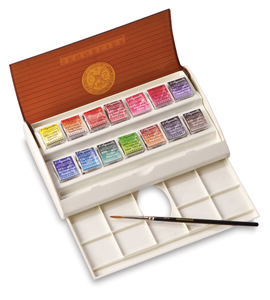
- Watercolors - Any basic set of watercolors will do. For this tutorial I used a set by Sennelier (the Sennelier Watercolor Travel Set with 14 Half Pans. In the past I have used student watercolor sets by Loew-Cornell. You can use either pan watercolors or tube watercolors, whichever you prefer.
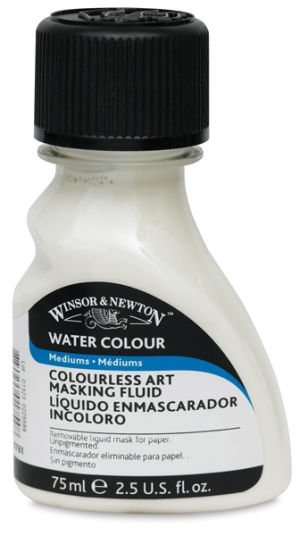
- Watercolor masking fluid - I used Winsor & Newton's Colorless Art Masking Fluid.
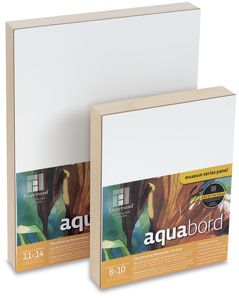
- Painting surface - I used an 8 inch by 10 inch Ampersand Aquabord because it is a strong, sturdy surface that doesn't require any preparation before use. Your painting surface can be any size you want and you can also use watercolor paper if you prefer.
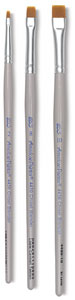
- 2 small, round paintbrushes - For this painting, I used 2 small round watercolor paintbrushes: an old, inexpensive one for use with the masking fluid, and a newer nicer brush for painting both the bottom background layer and for wetting the watercolor pencil marks. When using watercolor masking fluid, you should always use an inexpensive brush, because if the fluid dries on your brush, the bristles can quickly get damaged beyond repair.
- Bar of soap - For clean-up and also to protect the bristles of the brush you'll be dipping in the masking fluid (more on this in the tutorial).
- Cup of water
The Recommended Products below are there to help you browse for art supplies, and if you make a purchase I get a small commission that supports this site and keeps it FREE! Thanks in advance.
Step 1: Using masking fluid
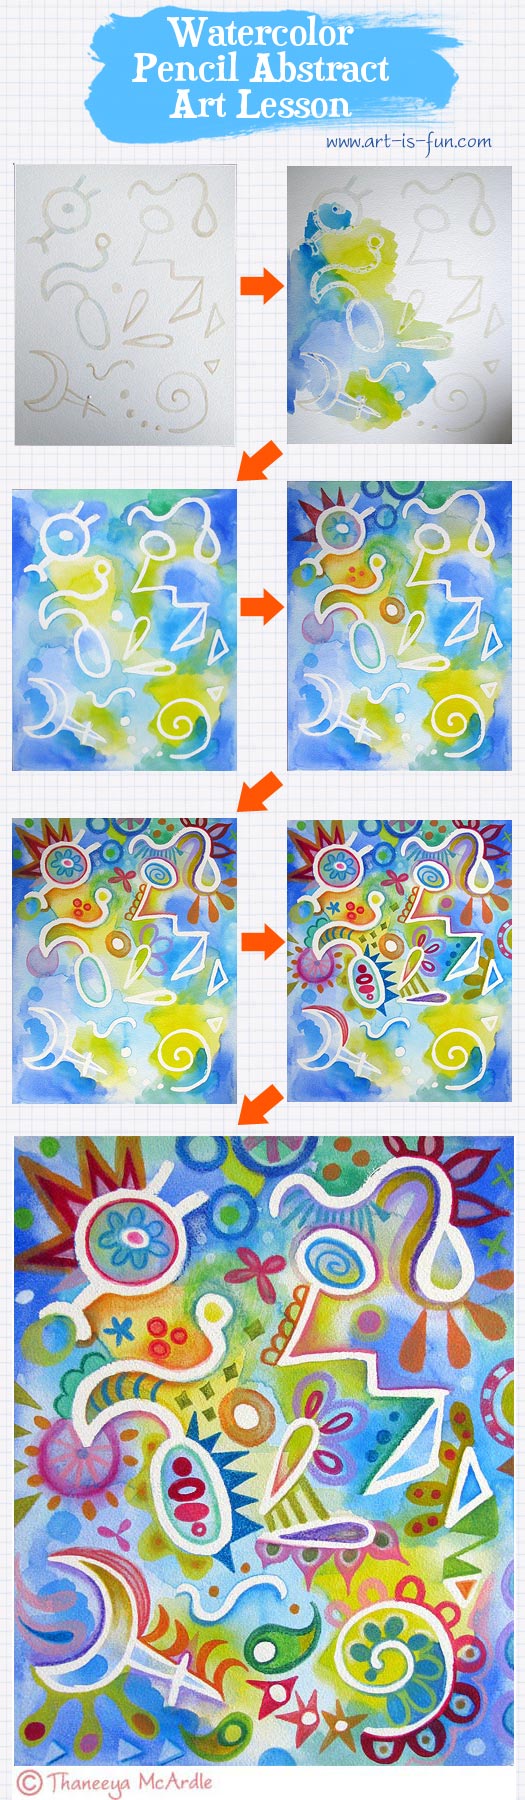
The first step of this Watercolor Pencil Art Lesson is to create abstract designs using watercolor masking fluid.
Before you start using your masking fluid, there are some things you need to be aware of:
First - and this is very important! - masking fluid dries quickly. This means that once you put it on your paintbrush, you need to move quickly to put the fluid onto your paper or board, before it starts to dry on the bristles. If masking fluid does dry on the bristles, it can be very difficult (often impossible!) to remove - and if you do manage to remove the dried masking fluid, your brush may be a stiff, unusable shadow of its former self. This is why you should use an old brush or an inexpensive brush when using masking fluid.
With that said, here's a tip that can help prevent your brush bristles from drying out while using masking fluid:
Rub the bristles over a bar of damp soap, working the soap into the bristles. Alternatively, you can add a drop of dishwashing liquid to a small cup of water, and dip the brush in that. Both techniques will help protect the brush against the quick-drying masking fluid. Then, without rinsing the brush, dip the brush into your masking fluid, and apply the masking fluid to your paper.
Be sure to apply the masking fluid to dry paper. If your paper is wet or damp, the fluid won't adhere properly.
When I use masking fluid, I clean the brush as soon as the bristles start to feel stiff, even if I'm not done applying the masking fluid everywhere I want it. This means I usually clean the brush several times before I've finished applying the fluid.
How to clean masking fluid from your brushes
To clean the paintbrush, hold it under running water and rub soap through the bristles until the bristles start to feel pliant and soft. If you still need to apply more masking fluid to your painting, rub soap into the bristles and leave it there (as described above). If you're done with the brush, rinse out all the soap and let the brush dry.
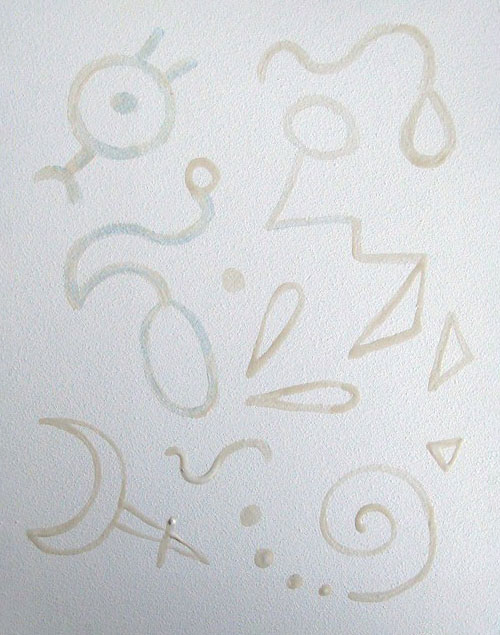
Paint designs with masking fluid
So now that you know all the technical stuff about using masking fluid, your next step is to use the masking fluid to paint whimsical abstract shapes and designs on your paper or board, like so:
Step 2: Paint your background wash
After the masking fluid dries (which won't take long at all - just a minute or two!), your next step is paint a wash of watercolor over the entire surface of your paper or board.
To do this, you'll paint right over the masking fluid, as you can see below:

Sometimes the paint "beads up" on top of the masking fluid, as in the example above, but that's okay! Just let it be. You don't need to try to wipe it off, because the masking fluid will resist the paint.
For my background, I used blues, yellows and greens. I let the colors overlap and blend into each other:

Here's how the painting looks all covered with a background watercolor wash:
Remember that this is just the background layer, and you'll be adding a lot of color and more designs on top of this, so don't worry about making your background "perfect". The point is basically to get a layer of color down, and then build from there!
Step 3: Remove the masking fluid
Once the paint is totally dry, you can remove the masking fluid. You'll want to be sure that any paint that has stayed on top of the masking fluid is dry too, otherwise it might smear when you try to remove the masking fluid.
Don't leave the masking fluid on too long - a week at most - because it gets harder to remove the longer you leave it on.
Some people use erasers to remove masking fluid, but I find it just as easy to use my fingers, like so:

To remove the masking fluid, put your finger on the edge of the dried fluid and rub:

The masking fluid will start to peel off and bunch up, as shown above.
Once you've removed enough masking fluid to grip it, you can pinch it between your fingers and pull, like so:
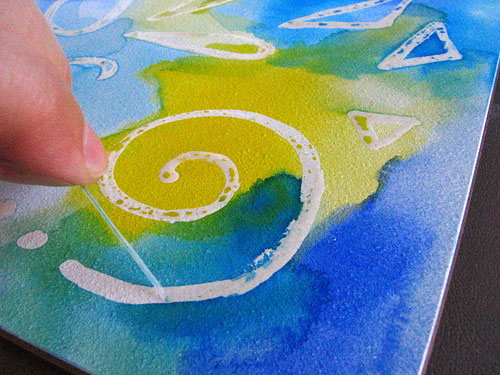
Then the masking fluid just peels off! Removing masking fluid can actually be kind of fun!
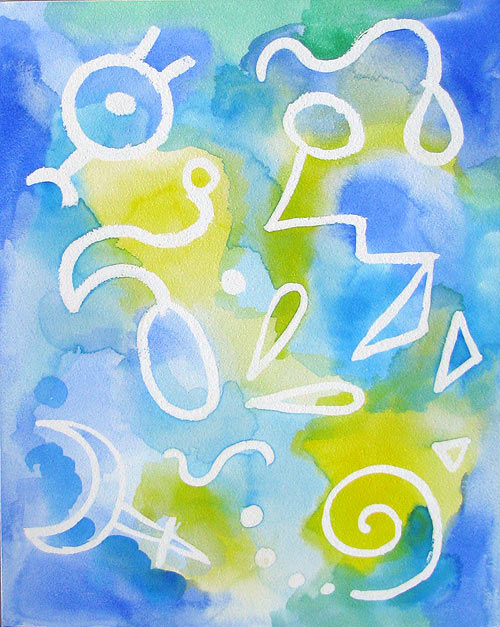
It's especially cool to see how your painting looks once all the masking fluid has been removed:
Step 4: Using watercolor pencils
After the masking fluid has been totally removed, now it's time to add colorful designs using your watercolor pencils!
If you're not sure how to get started, one approach is to pick a color and trace around one of your masking fluid designs. Let's see what I did...
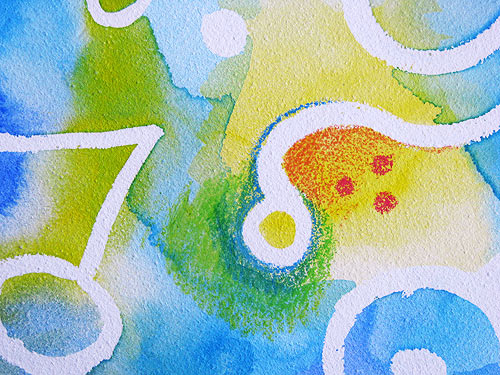
In the example below, I used a blue watercolor pencil to trace around the circle and part of the curve. Next I used green watercolor pencil to add light green around and below the circle. To the above right of that, I used an orange watercolor pencil to add color underneath the curve. Then I added 3 red dots:
Step 5: Use a paintbrush to add water
Once you've added a bit of color with your watercolor pencils, you can put your pencils down and add water to turn the pencil marks into paint!
Side note: For me, adding water is the really fun part. Rather than draw with watercolor pencils over the entire surface and then add water, I like to draw a bit with the watercolor pencils, then add water to what I just drew, then draw some more with the watercolor pencils, then add water to the new stuff I just drew - and so on until the artwork is finished. I just think it's more fun that way! But if you prefer to draw all over with the watercolor pencils first and then add water as the very last step, go for it!
To add water to the watercolor pencil marks:
Dip your clean paintbrush in a container of clean water.
Shake off and/or squeeze off any excess water.
Put the brush directly on top of the areas you colored with watercolor pencil, and work the water into the color.
The color will moisten and the pigment will spread, like watercolors!
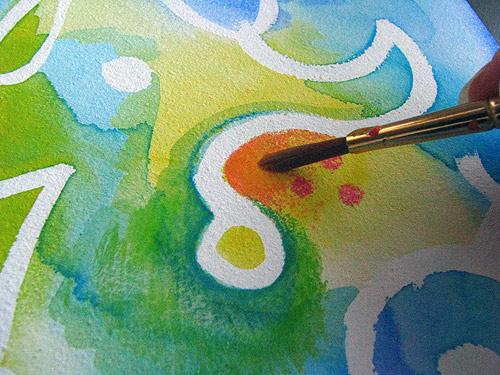
In the photo above, you can see what happens to the watercolor pencil when water is added.
Tip: Be sure to rinse your brush in between colors, or else the pigment from one color will stick to the brush and transfer onto the other color. For example, after I applied water to the blue and green parts above, I rinsed my brush with clean water before wetting the orange and red parts. I didn't want the blue or green pigment to muddy the orange and red parts.
Now let's step back and take a look at the painting at this stage:
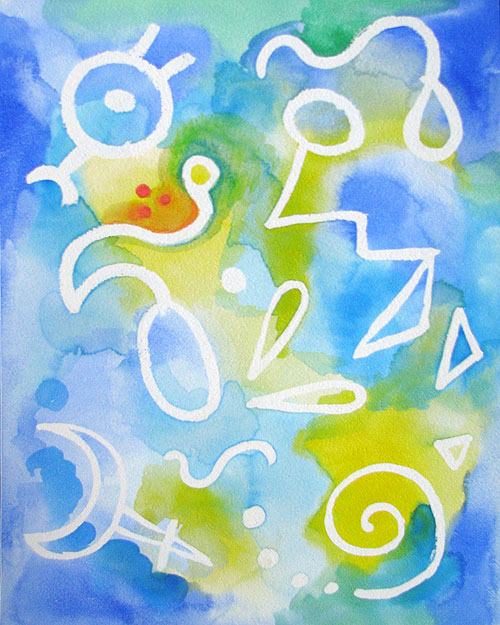
A good beginning!
Step 6: Add more designs until the painting is finished
Now it's time to add more designs with watercolor pencil:
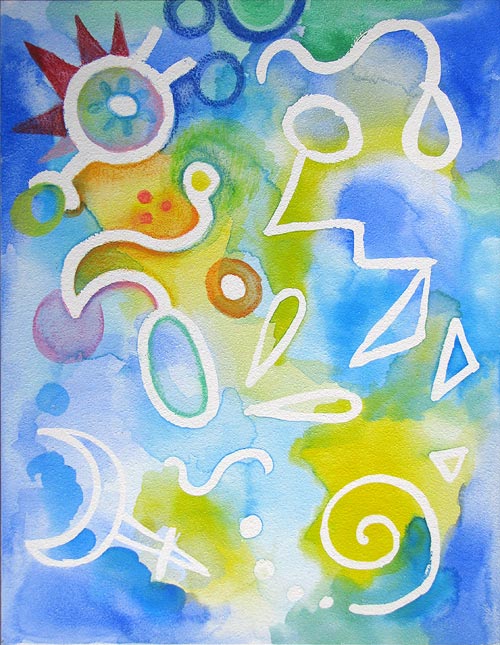
We're on a roll!
More designs are added and watered:
I basically work on one section at a time, drawing designs and adding water.
You don't have to water all the watercolor pencil areas if you don't want to. For instance, you might like the grainy, textured look of the watercolor pencil. Maybe leaving a few designs as-is will add another dimension to your painting. It's something to keep in mind as you work, anyway!

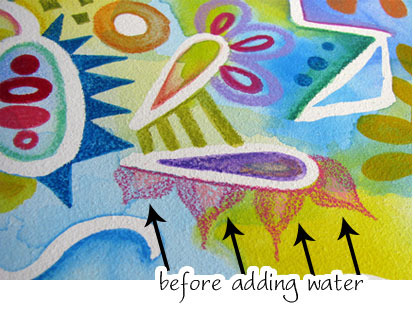
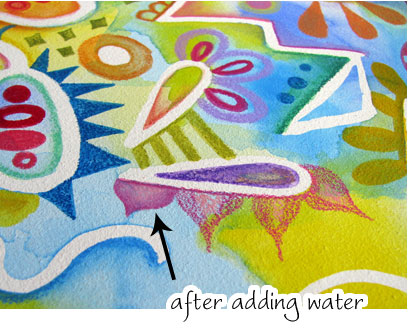
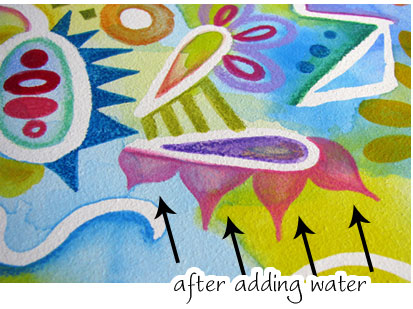
Below you can see a close-up showing how a specific area (the blue triangles) look after adding water. In the set of blue triangles below, on the left are 2 triangles to which I've already added water. On the right are 5 triangles that haven't been watered yet. It looks really different after water is added, doesn't it?

As I add more designs, I try to come up with new patterns. I also strive to balance the colors so that no single color dominates the composition. I'm basically trying to create a harmonious variety of shapes and colors that cause the viewer's eyes to bounce around the painting.

You can also experiment with putting different colors next to each other, so that they blend together when water is added.
For instance, below I drew light pink shapes surrounded by a darker pink:
After adding water, the shape has a light center that blends into a darker border. Here's how it looks when one of them is watered:
And here's how it looks after water has been added to all of them:
In this painting, I decided to keep all the areas I had originally masked white, to make them stand out. But if you want, you can color in your white designs or draw patterns within the white areas. You'll see some examples at the end of this tutorial of previous artwork I created using these techniques, except in those paintings, I chose to draw over the white areas with watercolor pencil.
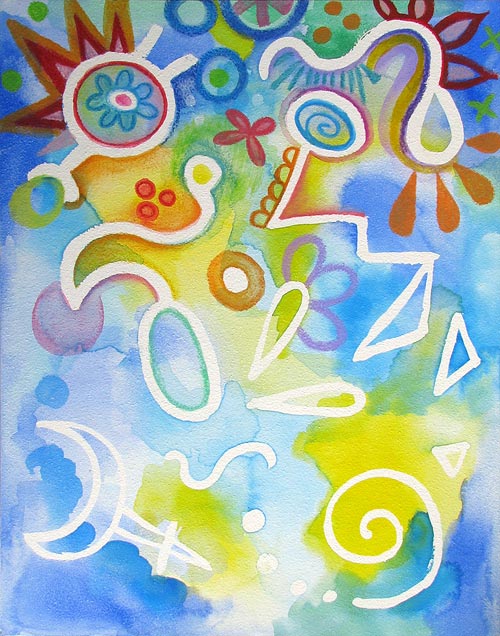
After more shapes and designs are added...
...the painting is done!
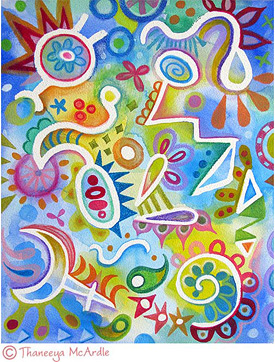
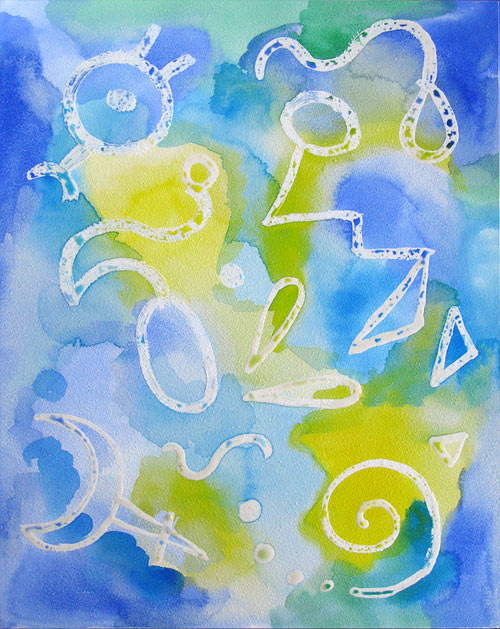
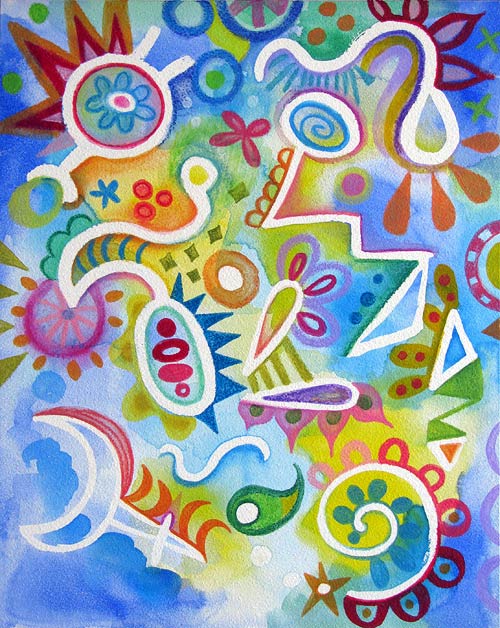
Here's the finished artwork:

Here's a close-up so you can see how some of the textured graininess of the watercolor pencil can show through, even after water has been added:

To refresh your memory and show you all the steps in a nutshell, here's a quick visual overview of the main steps we took in this watercolor pencil art lesson:
Step 7: Varnish your finished artwork
When you finish your piece and you're completely sure you don't want to add anything else to it, consider giving the artwork a coat of spray varnish. This will protect the painting from dirt, smudges, and UV rays - but most importantly, it will protect your painting if it happens to get wet again.
If an artwork containing watercolor paint or watercolor pencils gets wet, chances are it will smear or the colors could run. Watercolors and watercolor pencils aren't truly "sealed" unless they've been coated with a spray varnish, so until then, they are very vulnerable.
I like to use either Lascaux UV Protect or Krylon Crystal Clear (this links to Blick Art Materials, and if you make a purchase I get a small commission that helps support this site). Be sure to spray varnish your painting in a well-ventilated area, preferably outside, and follow all the instructions on the container.
Applying spray varnish can sometimes deepen the colors of your artwork, so if this is a concern you may want to do a test spray first. I personally like how the spray varnish deepens the colors and gives the piece a finished look.
Examples of other watercolor pencil abstract paintings
I hope this watercolor pencil art lesson sparks a plethora of ideas for you! The fun thing about this style and technique is that you can follow the same basic procedure and create a very different painting each time, depending on your choices of color, shape, design, and placement.
You could also try combining this media with ink or colored pencils. There are tons of possibilities!
To get the ideas flowing, here are several other abstract paintings I created using masking fluid, watercolors and watercolor pencils, mostly following the same process I outlined here:
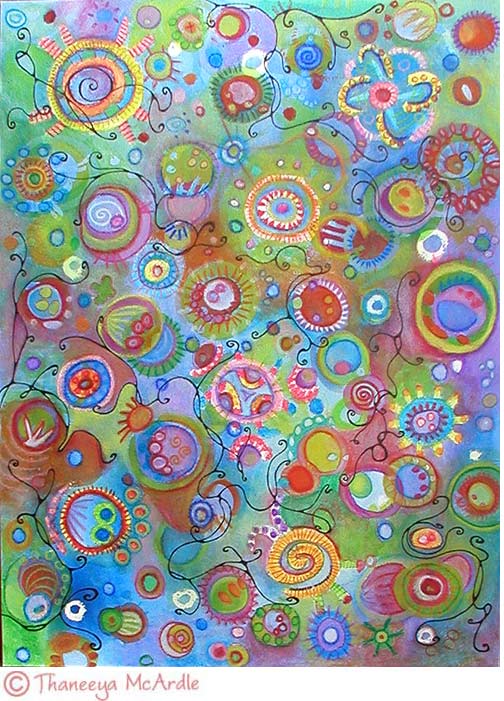
This was the first painting I did in this style, using the techniques demonstrated in this watercolor pencil art lesson. This is a 12 inch x16 inch painting on Ampersand Claybord Textured (now called Aquabord). In addition to using watercolor pencils and watercolors, I also used black ink to add whimsical wispy lines in the background. In this painting, I drew colored designs over the white areas that I had masked with the masking fluid, so it's a bit harder to tell which areas had been masked.


This painting is 12 inches by 16 inches on Ampersand Claybord Textured (now called Aquabord). To create this piece I also used the same techniques I described above.


This is an 8 inch by 10 inch painting on hardboard panel - similar to Ampersand Aquabord, but without texture, so it was more smooth. The smoothness created more of a challenge to apply the watercolor pencils, because they didn't adhere as smoothly as they did to the Aquabord. I also used black ink in this piece, this time to draw whimsical abstract designs inside the white circles that had been masked with masking fluid. Like in the previous 2 pieces, I added colored designs over the other masked abstract designs.


This piece is 5 inches by 7 inches, on watercolor paper. The other paintings I did in this style involve lots of blues, so this example shows you how it can look with a warmer color palette. First I masked the areas that you see as white, and then I used black ink to draw whimsical abstract designs all over the paper (including over the masked areas). Then I painted the background washes with yellows and oranges. Next I added some details using tube watercolors. After removing the masking fluid, I finished the piece with watercolor pencils.


This is a 5 inch by 7 inch artwork on Ampersand Claybord Textured (now called Aquabord). It's different than the other examples because I used the masking fluid to create images that are representative symbols, rather than purely abstract. While the masking fluid was still on, I carefully drew with watercolor pencils around the masked areas to create a soft patchwork background, with I then watered to spread the pigment. Then I drew more symbols over top using watercolor pencils.
Selling or publicly displaying art based on this tutorial
This watercolor pencil art lesson shows you how I make colorful, whimsical abstract art in my signature style. I truly enjoy sharing my techniques so that others may also enjoy the process of making art, rather than keep my processes a "trade secret" like many artists do. I figure, if making art makes me happy, I'd love for it to make you happy too!
Selling the art you make from this tutorial is fine if you are a hobbyist and you created one or two pieces in this style. As long as you made the painting "your own" and didn't copy my art directly, then I'm fine with that. But if you create several paintings based on this tutorial and you want to sell them, then you really need to think about how that will impact your art career.
If you are trying to make a name for yourself in the art world then it's very important that you develop your own style. The art world is smaller than you might think (thanks to the Internet) and trust me, people will notice if you copy another artist's style without crediting them. Developing your own style is one of the most important things you can do for yourself if you seek an artistic career.
I ask that if you plan to publicly display or sell your paintings that you made based on this lesson, please give proper credit, such as "Title of artwork, based on a tutorial by Thaneeya McArdle" or "Title of artwork, inspired by the work of Thaneeya McArdle". I thank you in advance!
Happy Painting!!


