Learn to Draw
review of the Lets Draw course
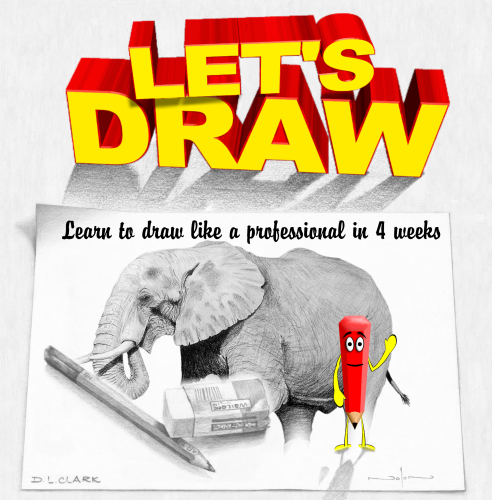
You can learn to draw right now with the fun and engaging Lets Draw course! If you want to learn how to create realistic pencil drawings like this:
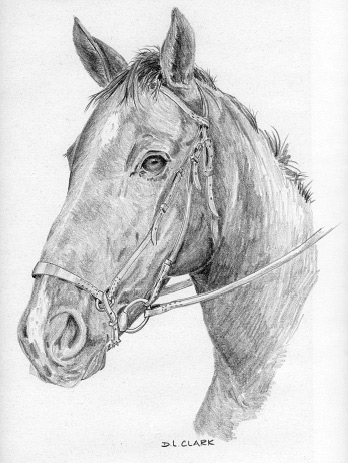
…read on!
If you purchase the Lets Draw course after clicking on one of the links on this site, Art-is-fun.com will receive a percentage of the sale as a "thank you" for sending you their way. After spending hours poring over the course material, I can heartily recommend the Lets Draw course and give it two thumbs up!
On this page I'll tell you all about this fun pencil drawing course created by Dennis and Nolan Clark (pictured below right in their New Zealand studio).

Dennis and Nolan Clark, your "Let's Draw" instructors
These two experienced art instructors have taught this course in real-life to thousands of students just like you. Now you can enjoy this course from the comfort of your own home through the Lets Draw video and ebook lessons, which means you can learn and practice at your own pace.
In this course you'll learn to draw animals, landscapes and still lifes. In addition to step by step lessons, you'll also learn plenty of art theory, which means you can take these techniques and apply them to anything you will ever want to draw.
Imagine seeing a barn like this and being able to draw it:
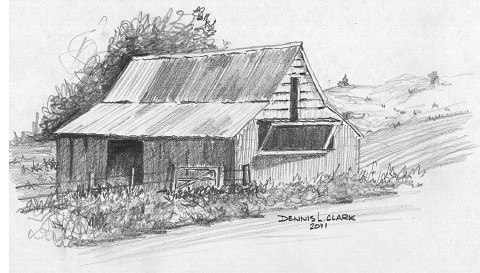
(You'll learn to draw this barn during the course!)
Gain a solid foundation of drawing skills
If you want to learn to draw but you literally don't know where to begin, Dennis and Nolan will help break down each step of the process. This course provides a solid foundation in drawing, starting with a thorough explanation of drawing materials. The bulk of the course involves step by step lessons, drawing theory and valuable tips.

You'll learn all the steps to draw berries, like these!
Each lesson builds on the techniques and concepts you learned in the previous lesson, so by the end of the course you are ready to go out and draw anything you want.
The Lets Draw course is mostly aimed at beginners, so if you've never drawn before – this course is for you! In fact, 93% of the people who purchase the Lets Draw course have never drawn before. No prior art knowledge or drawing experience is necessary.
However, this course is so comprehensive that even intermediate artists will also learn a whole lot from the lessons. I've been drawing for nearly 2 decades and even I picked up some handy tips from this course, which was exciting and motivating.
A fun way to learn to draw - at your own pace

In this course, Dennis and Nolan present each lesson in a fun, friendly style that is encouraging and easy to grasp. If you ever feel like you need to review a certain technique or lesson, you can go back to it as many times as you want!
Each section or lesson is divided into 'days' but you go at your own pace. If you complete 1 lesson per day you will learn to draw in only a month! But if you need to go at a slower pace, that's fine too.
The Lets Draw Course is available digitally, which means that you can get started immediately! You'll instantly have access to over 5 hours of helpful videos, and you can download the PDF course materials for printing or viewing on your computer.
Here's a quick depiction of the content in this course:
If you sign up for this course, I'll receive a percentage of the sale from Dennis and Nolan, which helps support this site. I'm recommending this course because I've viewed every lesson and I think it's a top notch way to learn how to draw!
What to Expect
Firstly, you'll receive the PDF manual containing over 300 pages of lessons which you will download and print. You can also view the manual on your computer, which can be handy for seeing their example images close-up.
Now I'll give you a very detailed overview of the lessons, and also share with you some of the things you'll see in the videos.
After you buy the course, you'll receive access to a screen that looks like this:

You can watch the video lessons right from your computer!
Getting Started

Can you guess what this is for?
Before you even launch into the pencil drawing lessons, be sure to watch Nolan' welcome video where he introduces himself and shows you his studio. He gives an encouraging pep talk and invites you to post any questions you might have on the forums as you learn to draw.
Pencil Drawing Equipment – Nolan clearly outlines all of the drawing supplies you'll need for this course, such as the different types of pencils and paper, and advises you on what to get. He also tells you about other equipment that you'll use during the course.
Nolan also explains how to set up your drawing area in a way that helps you achieve the best results as you learn to draw, from choosing the right lighting to selecting a suitable drawing surface (or table).
Once you're all set up, you're ready to start the pencil drawing lessons!
Drawing Course Lessons
Because this course started out as a live workshop, each lesson is divided into 'days'. However you will learn to draw by following this course at your own pace, so you don't have to do just one lesson per day and you can take a day off when you need to. Just be sure to follow the course in the order that it is outlined. It might be tempting to skip ahead, but the material will make more sense when you go step by step from Day 1 to Day 27.
Just think of each 'day' as a 'lesson'. In each lesson you learn new skills and gain new knowledge about drawing, so each lesson builds on the previous lesson, giving you a solid foundation for drawing.
Please note:
The overview you are about to read is very detailed!
I tried to create the feeling of flipping through a book at a bookstore, so you can browse before you buy.
If at any time you feel convinced to give the Lets Draw Course a try, simply click here or on any of the sample images and you'll be taken to the Lets Draw website where you can purchase the course.
Also, feel free to skim this section if the amount of info is overwhelming to you. If this is overwhelming, just imagine how much valuable content and information the course will provide you!
Here's an overview of each day's lessons:
Day 1: Pencil Sharpening Techniques – To start you off on the right foot, Nolan shows you different ways to sharpen your pencil to create different effects! This lesson goes far beyond just sticking the pencil into a sharpener. Nolan also provides safety tips so you don't hurt yourself while trying out these sharpening methods.
Basic Pencil Grips and Strokes - Drawing with a pencil is different from writing with a pencil; there are a greater variety of ways that you can hold and use the pencil. In this lesson you'll learn how to hold your pencil. Nolan also explains different ways of moving the pencil to create a variety of strokes.

Day 2: Pencil Erasing and Smudging Techniques – Just as drawing with a pencil is different from writing with a pencil, so is erasing. Nolan shows you the best ways to erase your drawings. He also demonstrates techniques for using the eraser to soften a hard edge. You'll also learn how to do smudging with a tortillon, plus how to make your own.
Erasing a Landscape – This fun lesson that shows you some neat techniques to create a mountain landscape! It's easier than you think.

Day 3: Tonal Values – Next you'll learn which pencils to use to create different values (also known as "shades"). Nolan shows you how to draw your own tonal chart which will help you better understand and render tonal values in your drawings. This lesson includes a blank chart that you can print out and use to draw your values.
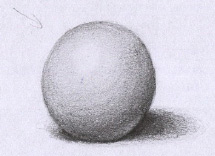
Day 4: Light, Shadows & Reflected Light – This is an invaluable theory lesson about light sources and angles; how they affect the objects we want to draw, and the types of shadows they cast. Nolan shows you some shading techniques so you can put everything you've just learned about light, shadows and reflected light to use. He tells you which pencils to use when as he demonstrates how to draw a round,shaded ball from your imagination. You'll learn to draw graduated tones to make objects looks smooth.
Day 5: Pencil Drawing Transfer Techniques – When you work from a reference image (a photo, picture from a magazine, etc) you'll need to "transfer" that image onto your drawing paper. In this lesson Nolan shows you 3 easy ways to transfer a reference image onto your drawing paper that don't require any special equipment or elbow work.
Day 6: Learn to Draw Berries in Pencil Step by Step – Here's your first "real" drawing lesson – a bunch of berries! Don't worry, it's not as hard as it might look. Nolan breaks down the process to its step by step components, revealing how straightforward it really is. Some things you'll learn include: what to look for when determining the direction and quality of light; how to get started with your drawing; how to decide which pencil to use; what are lost and found lines and why is it good to know about them?


Learn how to go from a blank outline to a finished drawing!

Day 7: Day off - Relax and rest easy! It's your day off. On days off, you can either take a break or review the past week's materials to make sure you really understand it. You can also do some practice drawing on your own.
Day 8: How to Render Planes and Angles - How to Draw Rocks Step by Step – In this lesson you'll learn how to show different angles or 'planes' in your drawings, and you'll learn why this is important. Nolan will also help you figure out which direction to shade in.
Day 9: Pencil Cross Hatching Techniques and Exercises – Next you'll learn how to create different tonal values through cross-hatching - without smudging or shading! This builds on yesterday's lesson about rendering planes. Nolan explains what kind of pencil, point and grip to use. He'll show you how to draw a coffee mug, and you'll learn how to find the directions, angles, shadows and highlights.
Day 10: How to Draw a Teddy Bear Step by Step – In Day 10 you'll fuse your newfound knowledge by drawing a teddy bear. At first, drawing a teddy bear might seem overwhelming, but Nolan makes it easy to walking you through each step. Day 10 is full of tips, including an explanation of which types of images lend themselves well to the hatching technique.

Day 11: Pencil Scumbling Techniques - How to Draw Fish Step by Step – What is scumbling? You'll find out in this lesson! You'll learn things like: different types of scumbling strokes; how to shade through scumbling; how to combine fine detail with scumbling; which pencils to use when, as well as where and how to start your drawing.
Day 12: Learn to Draw Textures – This lesson is a 2-parter. You'll learn how to notice the different textures in the objects you want to draw, and Nolan will demonstrate 9 basic techniques that can be mixed and matched to draw any texture you can think of. Plus, you'll learn about positive and negative spaces – why it's important an important concept and how understanding this concept can help with your drawings.

Nolan demonstrates a technique for drawing texture.
Day 13: How to Draw an Old Barn - This lesson is also a 2-parter with a fun surprise: an interview with Dennis, Nolan's dad and the creator of the original Let's Draw course. (This is a video available to PC, DVD and online students.) In this lesson, you'll learn how to find inspiration in the objects around you. Anything can be a subject for drawing! Dennis demonstrates how you can change 'reality' by omitting objects or adjusting the perspective to make the drawing more pleasing. You'll learn the different textures and processes used to draw an old barn.
Day 14: Day off - Relax and take it easy! Maybe go outside and find something fun to draw for extra practice.
Day 15: How to Easily Draw Complex Scenes by Finding Shapes – Learn how to simplify complex scenes into their basic shapes, which makes them much easier to draw. This is an important skill that you'll carry with you throughout all your future drawings. After explaining the concept, Nolan provides a sample still life and asks you to draw its basic shapes. This is good practice, because at the end, Nolan shows you how it should look.

Find out what this is all about
Day 16: Resizing Methods – Here you'll learn 5 easy methods for creating a drawing that is larger or smaller than your original reference photo. One of the methods involves using a proportional divider, which you can print and assemble to help you resize your drawings.
Day 17: How to Enlarge and Reduce your Drawings Using the Co-ordinate & Calculator Methods – Nolan presents 2 more methods for resizing your drawings, involving math and rulers.
Day 18: The Grid Method: How to Use a Grid to Redraw a Photo – The grid method is an ancient and time-honored way to resize your reference image. To quote Nolan: "The grid method allows us to redraw a picture to absolutely any size without having to worry about proportions, ratios or calculators. All we need is a grid, ruler and a pencil."

Learn the Grid Method
This is an extremely detailed lesson with step by step instructions about the grid method. Ample tips are provided and there are handy grids you can print out in mm or inches. Nolan also explains what to do if your reference image is not the same size as your paper. With 16 whole pages dedicated to the topic, this is one of the best resources on the grid method I have ever seen.
Day 19: How to Draw Animals – Now you're ready to apply your skills to drawing animals. Nolan demonstrates how to draw a squirrel, including tips on how to draw fur effectively, what kind of strokes to use and how to shade. He shows you how to do a quick yet detailed animal drawing. This lesson puts all of the skills you've learned so far to good use.
Day 20: More Animal Drawing Exercises – This lesson shows you how to draw different types of fur, hair, hide, feathers, wool, and whiskers – important skills to have when drawing animals. Then you'll learn how to draw the head of a horse. Nolan explains which pencils and techniques to use as he guides you step by step through this drawing lesson. A few animal reference pictures are provided so you can practice.

Learn to draw whiskers using a special technique:
Day 21: Day off - Another day off! Congratulate yourself, because you are almost done with the course.
Day 22: Perspective: Finding and working with Vanishing Points – At 27 pages, this is the longest lesson – because it's important! You will learn about perspective and how to create the illusion of depth and distance on a flat surface. Nolan covers the concepts of linear perspective, aerial perspective, color perspective, foreshortening, and the law of overlapping. There's an exercise to help you learn to find the vanishing points in a scene. You'll learn to work with vanishing points and altered perspectives. Oh yes, and you'll also learn why it's so important to learn about vanishing points in the first place! Take your time and don't rush this lesson, to ensure that you really absorb the material.
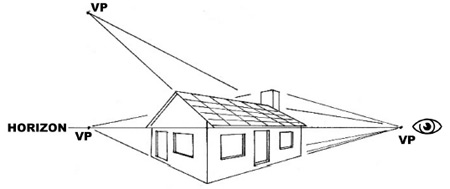
When you finish this lesson, this diagram will make sense to you
Day 23: Still Life Composition Techniques – Learn how to compose and draw your own still life. Nolan teaches you how to select objects, how many objects to use, how to create and use a lightbox to create more dramatic lighting, how to arrange them in interesting ways, and then how to look at the still life and draw it and, starting by noticing the shapes. Plus, you'll learn about notan sketches. Find out: what is a notan sketch and how can it help you arrange your still life?
Day 24: Drawing a Still Life, continued. – In this lesson, you learn about thumbnail sketches and why they are helpful. In addition to explaining how to create thumbnail sketches, Nolan also explains how to select the right tonal shade when drawing a colored still life, and how to deal with reflective and transparent objects.

Learn how to turn this into a shaded still life drawing
Day 25: How to Draw Outdoors – Drawing outdoors is different than drawing inside. Find out what equipment you'll need for drawing outdoors, what to look for, how to set yourself up, how to transfer the scene or object in front of you onto paper, learn techniques for getting the basic outline in place, and find out what to shade first and why. Whew, that's a lot for one lesson, but once you get comfortable drawing outdoors you can draw anywhere you go!
Day 26: How to Draw Foliage and Landscapes – Learn all about drawing trees, bushes, branches, tree trunks, roots and foliage. Drawing leaves can be tricky but Nolan makes it easy by showing you which strokes to use to give the impression of leaves, so you don't get lost in the details.
Ready to drawing a landscape? Nolan explains how to look at different landscapes and figure out which techniques you'll need to use to draw them. He demonstrates using a viewfinder to help with the composition and walks you step by step to show through his process of drawing a landscape.

Day 27: How to Draw Flowers – This is a fun way to round out the drawing lessons, because everyone loves to draw flowers! Learn how to start your flower drawings, how to improve your observation skills so you notice all the details, and what strokes to use where. You'll also review lost and found lines and cast shadows as you draw your flower along with Nolan.
Day 28: How to Store, Protect and Frame Your Drawings – Now that you've created all these drawings, find out how to keep them in good condition. Learn how to spray your drawings with a fixative, and how to store them to prevent things like smudging, moisture damage discoloration from sunlight. Nolan also teaches you about matting, framing and hanging your artwork.

Nolan demonstrates how to spray your drawings with a fixative
* At the end of each lesson are also additional bonuses, such as black and white photos you can draw from and pencil sketches you can study as examples.
If you sign up for this course, I'll receive a percentage of the sale from Dennis and Nolan, which helps support this site. I'm recommending this course because I've viewed every lesson and I think it's a top notch way to learn how to draw!
After you buy the course you can also download and print the accompanying PDF files. The online interface of the Lets Draw course offers a handy menu that gives you access to all your course material right at your fingertips.
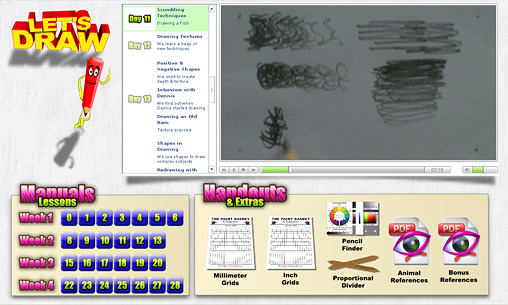
Here's a screenshot of the easy-to-use interface:
One of the best things about the course is access to the forum, where you can ask questions about the lessons, post your artwork and receive valuable feedback. This helps give you the fullest learning experience that most closely resembles what it would be like to attend one of their workshops in person, except you can work from the comfort of home at your own pace.
My opinion
It took me a long time to look through the Lets Draw course because they just have so much to offer! I was really impressed with the content and presentation of the course material. All of the concepts are thoroughly explained through words and images. Each section also contains valuable tips that are too numerous to mention here.
The Lets Draw course is an incredibly thorough pencil drawing course that gives you a solid foundation of drawing skills. The combination of theory plus step by step instructions makes this course a worthwhile investment for anyone who wants to learn to draw. Most other home-study drawing courses I've come across are weak on theory, which means that students only learn to draw the objects they are shown how to draw step by step in the course. That's how this course is different: Dennis and Nolan go beyond the step by step lessons and provide you with the knowledge and skills to confidently draw anything you want.
If you'd like to explore the Lets Draw course more before buying, click here and scroll halfway down to view the Lesson 1 video, PDF and handouts and see what you think. You can also skip forward to the Day 19 Video: Drawing Animals, and the accompanying PDF manual too.
If you purchase the Lets Draw course after clicking on one of the links on this site, Art-is-fun.com will receive a percentage of the sale as a "thank you" for sending you their way. After spending hours poring over the course material, I can heartily recommend the Lets Draw course and give it two thumbs up!
All of the images in this review come directly from the Lets Draw course, so credit goes to Dennis and Nolan Clark for the use of these images.


